删除WindowsApps目录
傻叉的微软apps目录,默认删不掉,重启还自动创建。
- 先删除设置,应用管理里面的“游戏服务”
- 修改文件夹权限,然后就可以删除了。
takeown /F "D:\WindowsApps" /A /R /D Y
icacls "D:\WindowsApps" /T /grant administrators:F傻叉的微软apps目录,默认删不掉,重启还自动创建。
takeown /F "D:\WindowsApps" /A /R /D Y
icacls "D:\WindowsApps" /T /grant administrators:F装好vim-go插件后,本可以在vim中使用:GoInstallBinaries来安装各种依赖。
但可能网络不好使,需要go设置好7牛的代理来命令行安装包.
go install github.com/nsf/gocode@latest
go install github.com/bradfitz/goimports@latest
go install golang.org/x/tools/cmd/guru@latest
go install golang.org/x/tools/cmd/gorename@latest
go install github.com/rogpeppe/godef@latest
go install github.com/kisielk/errcheck@latest
go install github.com/jstemmer/gotags@latest
go install github.com/klauspost/asmfmt/cmd/asmfmt@latest
go install github.com/fatih/motion@latest
go install github.com/zmb3/gogetdoc@latest
go install github.com/josharian/impl@latest
go install github.com/golangci/golangci-lint/cmd/golangci-lint@latest
go install github.com/fatih/gomodifytags@latest
go install honnef.co/go/tools/cmd/keyify@latest
go install golang.org/x/lint/golint@latest
go install github.com/davidrjenni/reftools/cmd/fillstruct@master
go install github.com/go-delve/delve/cmd/dlv@master
go install github.com/koron/iferr@master
go install golang.org/x/tools/gopls@latest
vim 插件代码使用python需满足几点
查询vim支持和版本
:version
:py2 import sys
:py2 print(sys.version)

:py3 import sys
:py3 print(sys.version)python3在window上已安装,命令行也能正确识别到。
但cmake工程中的find就是找不到python3。
cmake生成工程加了-A win32参数,导致cmake只会去找32位的python。
错误信息:
_python3_executable-notfound卸载64位的python,重新安装32位的python,问题得以解决.
勾选自动拆切,可能有奇数图,导致渲染出来是胡的。
大部分文章都是
$ cat /proc/cpuinfo
$ cat /proc/meminfo
但是对于arm系统非常不友好,看不到什么信息。用下面的新命令吧.
$ lscpu
$ lsmem$ sudo port -v selfupdate
$ sudo port upgrade outdated
$ sudo port install dos2unix$ cd /xxx/xxx/textFileRootDir
$ find ./ -type f -exec dos2unix {} \;local function encodeHtmlSpecialChars(str)
local html = {
["<"] = "<",
[">"] = ">",
["&"] = "&",
}
local decstr, _ = string.gsub(tostring(str), "[<>&]", function(char)
return html[char] or char
end)
return decstr
end
local function decodeHtmlSpecialChars(str)
local html = {
["<"] = "<",
[">"] = ">",
["&"] = "&",
}
local rawstr, _ = string.gsub(tostring(str), "%b&;", function(char)
return html[char] or char
end)
return rawstr
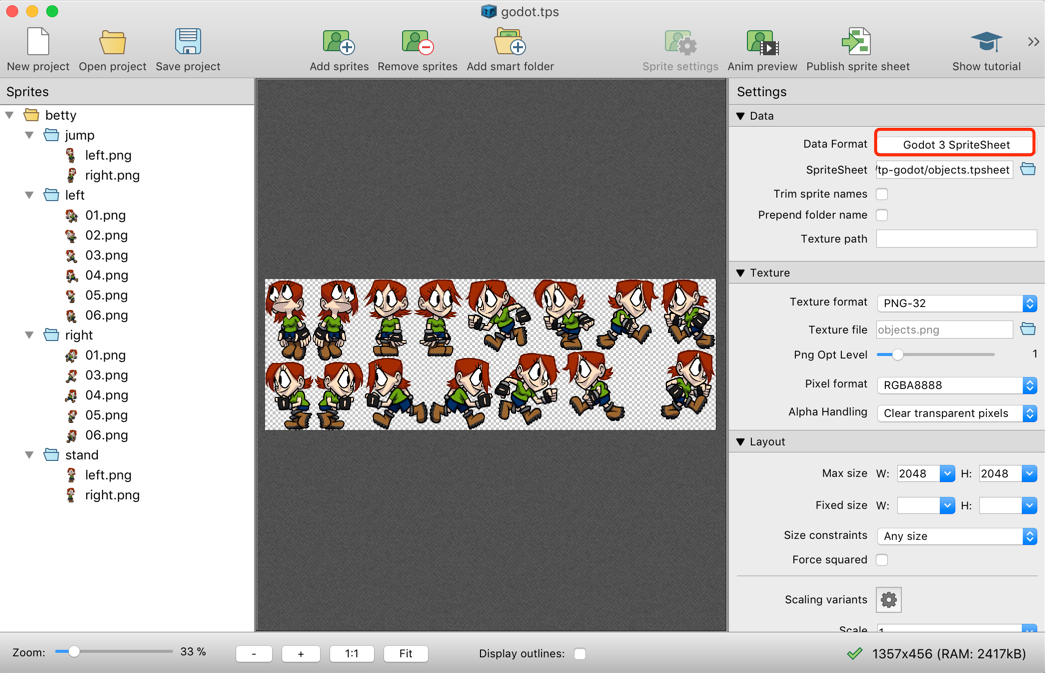
endgodot支持TexturePacker需要使用到CodeAndWeb官方提供的TexturePacker Importer插件.
下载TexturePacker Importer,解压并放到工程的addons目录下.
TexturePacker中设置导出格子为Godot格式
在把资源导入godot工程就可以使用精灵表单中的帧了.